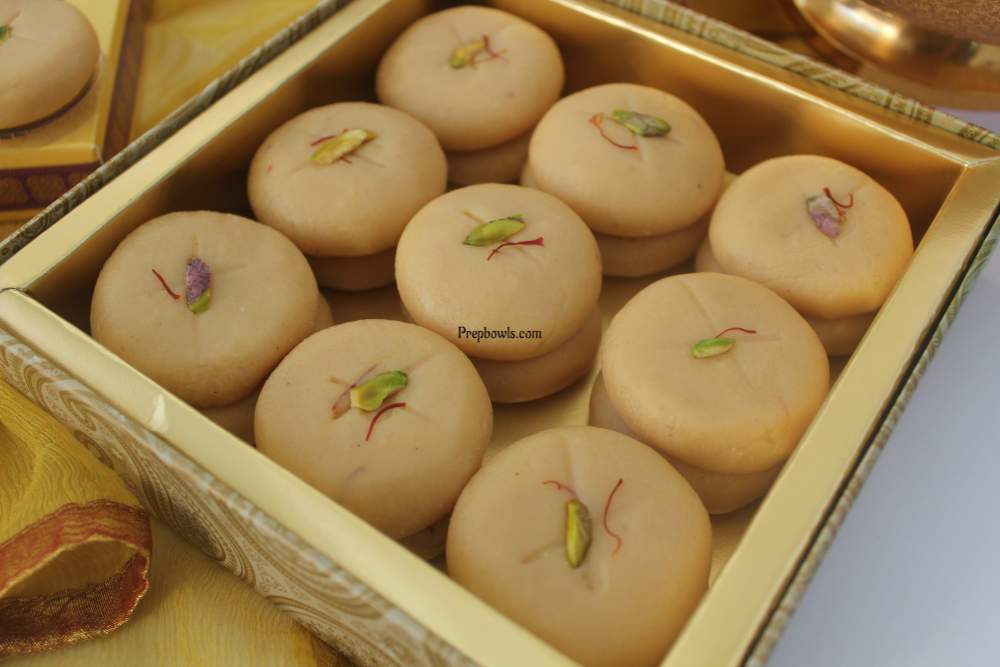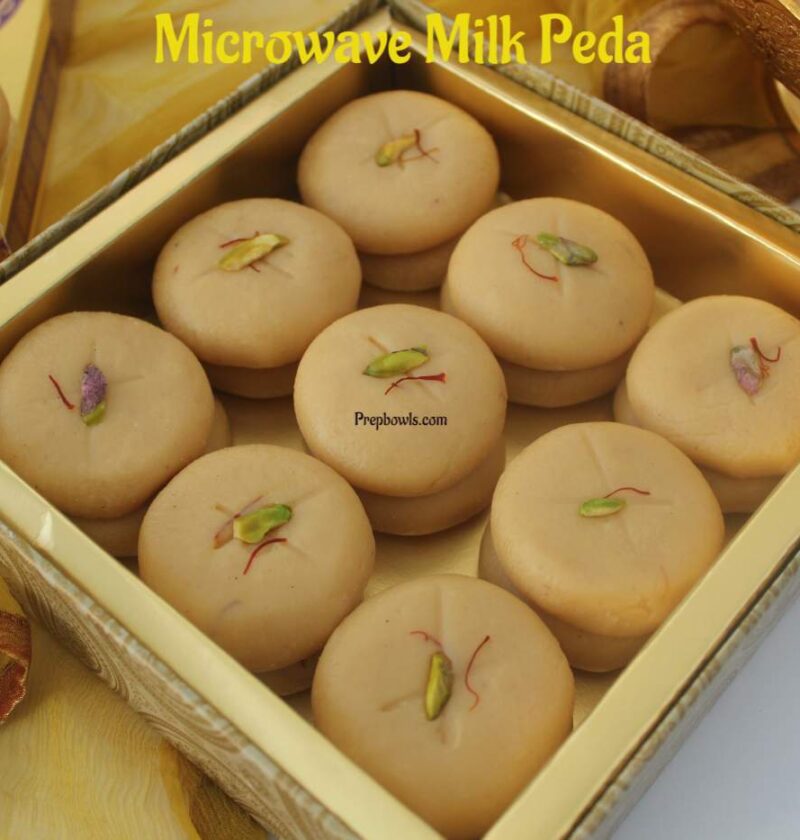
Milk Peda | Doodh Peda is a very popular sweet from the Indian subcontinent. The sweet is soft in texture, and melts away in your mouth, perfect for any occasion. It is made in individual pieces, so it is easy to serve. Milk Pedas have a pleasingly rich taste, and it is not very sweet. There is no sweet shops in India without selling milk pedas, a very popular sweet among many. It is unbelievably very easy to make it using the microwave, you will need only “5 Minutes” to make, and “5 Ingredients” only. Homemade Pedas are great for festival days, marriages, any parties or simply make it and enjoy it as a evening snack. Recipe includes stepwise pictures and tips to make perfect peda shapes.
Over several years, every time I made these pedas, it turned out exceptionally good. I couldn’t believe it when I first made it, with perfect shape and texture, so delicious taste, basically will melt in your mouth with every bite!! These milk pedas are usually made with khoa /Khoya (it is a dairy product, made of either with dried whole milk, or milk thickened by heating in an open iron pan. It is low in moisture than typical fresh cheeses such as ricotta), sugar, cardamom, and ghee, which is then cooked in low flames until a soft dough consistency to make peda shapes. This is how my mom makes pedas , and it takes a very long time and patience to make it on the stove top.
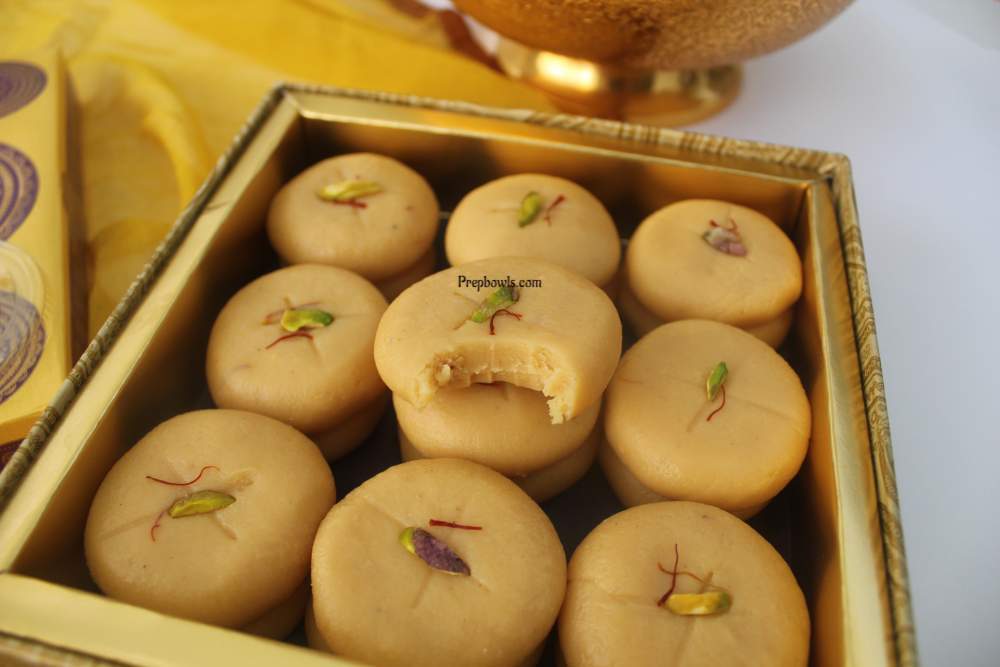
This microwave version is so easy, and super quick to make, but the texture and taste is 100% the same with the pedas made in the traditional method. Small tweaks can give the signature store brought look to the pedas, simply follow this recipe, and the tips given, and I am sure you’ll love the outcome.
I usually make these pedas for a lot of occasions, and also gifted it to my friend & family, shared it as Thanksgiving/Christmas gift box to my well wishers over years. Everyone was so pleased with my homemade sweets, and thanked me for making a exceptionally delicious sweets. Do try it and make it for your loved ones and please them!
What milk powder to use?
In this recipe, I’ve used DEEP brand “pure milk mava powder” from Indian store, but the milk mava powder is also available in Walmart online. Any brand Mava Powder will work for this recipe.
What to substitute if you do not have milk mava powder?
You can substitute any other Full Fat / Full Cream / Whole Milk – Dry Milk Powder for Mava Powder used in the recipe. But I highly suggest using mava powder if you’re able to find it for making these pedas for the best texture. Note – Only use full fat milk powder as a substitute.
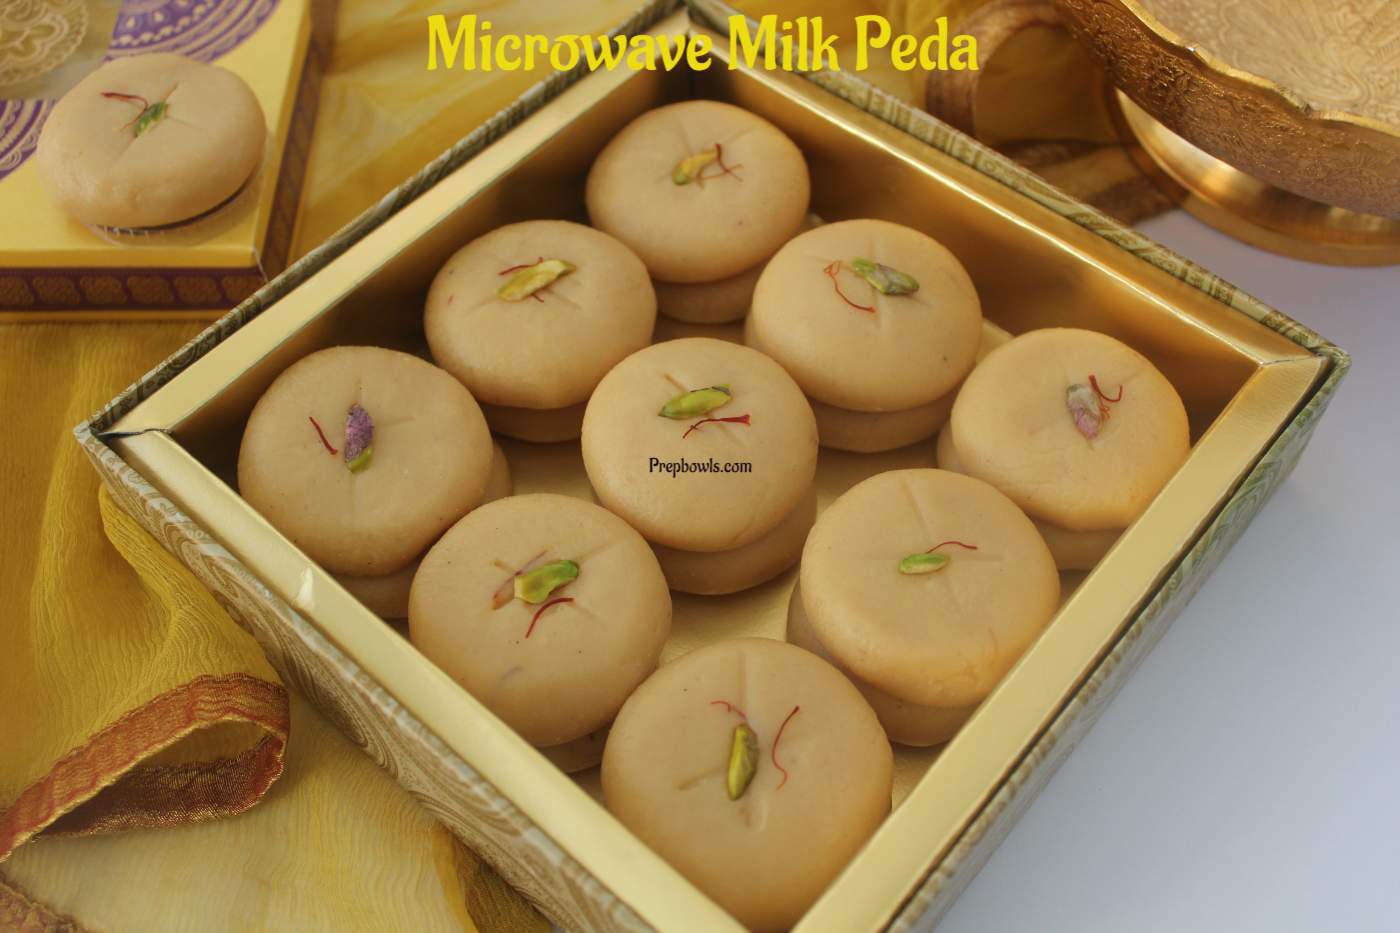
Difference between milk powder and milk mava powder?
- Milk powder, and milk mawa powder can be the very same thing, provided that they both have full-fat contents . The fat content in both the powder is same, but the process of making both the powder are different. Milk mava powder is also likely to have a different texture than regular milk powder, this is due to the fact that mava powder may be curdled before its evaporated, giving it a final texture that’s rough.
- Note – Avoid using nonfat milk powder, It will not produce the same texture, consistency, and richness like in whole milk /mawa powder.
Where to buy milk mava powder?
I got mine from Indian market in USA. In this recipe, I’ve used DEEP brand “pure milk mava powder” from Indian store. You can also buy milk mava powder from Online Amazon , Walmart online. Any brand Mava powder will work for this recipe.
Condensed milk / milkmaid used in the recipe
- I used sweetened condensed milk which comes in 14 oz cans from Costco in USA. But you could use any brand sweetened condensed milk, also sold as Milkmaid in Indian stores.
- Almost All brands will sell them in 14 oz cans only, so you can directly add one full can without measuring it.
- I’m not sure about using homemade condensed milk – the consistency might not be thick , and may not result in the same texture, but you may try using it.
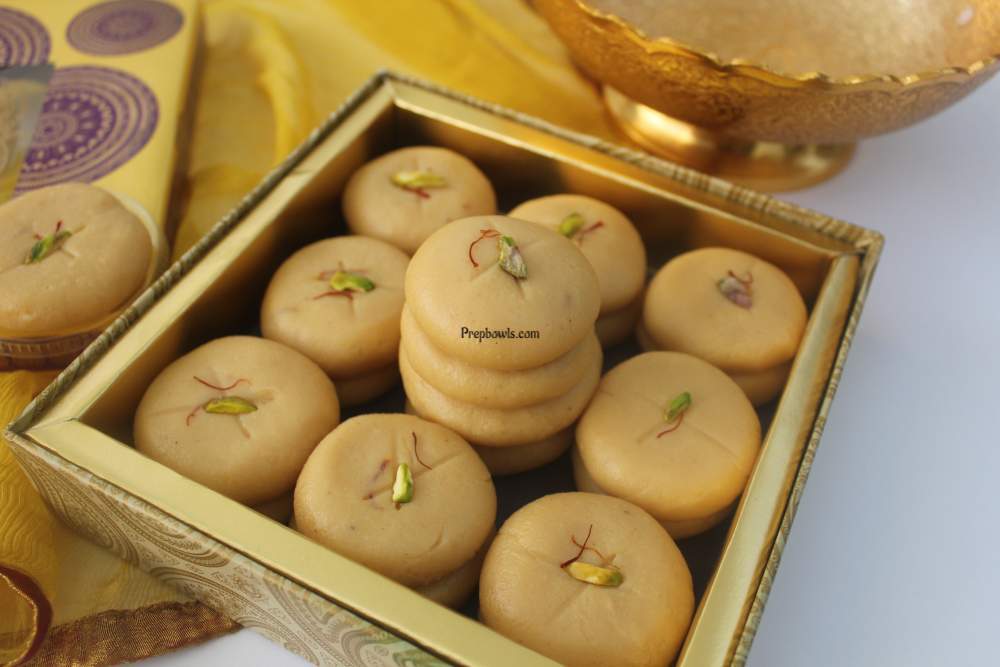
If making it for a party or any occasion, I recommend making it a day before
- Make the peda, shape it, cool down (if its still warm) and refrigerate it in an air tight box. Grease the container/ box with some ghee, and then place the prepared peda in a single layer (without stacking them) and refrigerate it.
- When ready to serve, bring the peda to room temperature or remove from fridge at least 30 minutes before serving it so you’ll have the soft texture. By refrigerating the pedas, the consistency tightens a bit, and gives the perfect semi hard texture.
Note – Do not reheat / microwave the refrigerated milk pedas. Refrigerating the peda is recommended but not necessary.
Points to note when making milk peda in bulk
- Simply double or triple the given ingredients in the serving size on the recipe card below for the exact measurements .
- Make sure to use a big deep microwave safe bowl. The dough will rise when cooking in the microwave, if there is no enough space , it will overflow and get messy.
- Recommend to make the pedas a day or two before the event and refrigerate in a air tight box. Arrange the prepared pedas in a single layer on a ghee greased box without stacking them. This helps the pedas to tighten a bit and to get a perfect texture, but not necessary if you don’t have time.
What makes these milk pedas special when making it for an occasion / gathering?
- These milk pedas can be made in individual pieces, so it is easy to make an approximate total count on the servings.
- Secondly, it is a very popular Indian sweet throughout the country, and all age group of people like these milk peda , its definitely a show topper. Perfect for even kids too, as it is soft in texture and not very sweet in taste.
- It can be conveniently made ahead of time and refrigerated for up to a week.
- You do not have to reheat the peda like other desserts , simply serve the sweet straight from the refrigerator on the buffet / serving table without heating it. You’ll only need few minutes of thawing time, which you’ll any way have it while arranging other dishes. When arranging it on the serving table, you can stack the refrigerated pedas on the serving trays.
- Finally a these pedas are Totally “A MESS FREE Dessert” to serve for a crowd.

Storing Suggestions
- Store any leftover pedas in a clean dry – air tight box for up to a week in the refrigerator. Thaw at least 30 minutes before serving it, but not mandatory. Note – do not microwave the pedas.
- If making it for a party – Make the peda, shape it, cool down (if its still warm) and refrigerate it in an air tight box. Grease the container/ box with some ghee, and then place the prepared peda in a single layer (without stacking them) and refrigerate it.
Serving Suggestions
- If you’re making the pedas and serving it the same day or immediately, cool down the prepared pedas to set until slightly hard to touch (approximately 15 to 30 minutes or more depending on the room temperature). But honestly if you don’t mind the perfect shape pedas you can eat / serve it immediately.
- If making it in bulk for an occasion – When ready to serve, bring the peda to room temperature or remove from fridge at least 30 minutes before serving it so you’ll have the soft texture. By refrigerating the pedas, the consistency tightens a bit, and gives the perfect semi hard texture.
Yield from this recipe ?
The given recipe Yields 21 medium size milk pedas.
Find below Traditional Indian cuisine dessert recipes, for festival, holidays or for any celebrations, Check the links below, I have listed few below. For the complete list of dessert recipes, check the link here – Dessert Recipes from around the globe.
- Instant Pot Beetroot Halwa Recipe
- Cantaloupe Fruit Kesari | Semolina Sweet
- Instant Banana Appam / Banana Fritters
- Rava Kesari – Classic Recipe
Desserts from other cuisines,
- Easy Beginner’s French Macarons with Mango Buttercream – A complete guide and stepwise pictures
- Easy Tiramisu Recipe – No Bake Dessert
- Eggless Chocolate Cake With Chocolate Buttercream Frosting
- Easy Pumpkin Crinkle Cookies Recipe
- No Churn – Eggless Pistachio Gelato
- Eggless Black Forest Cake
- No Bake – Oreo Ice Cream Cake
Step by step pictures of how to make the milk pedas in the microwave
Ingredients Required – Sweetened condensed milk ( I used one full 14 oz tin ) , Pure milk mava powder , unsalted butter ( I used one full stick Costco – Kirkland brand butter) , cardamom powder ( I used readymade cardamom powder from Indian store , If making at home – grind few whole green cardamom in the mixer to a fine powder ). Optional Ingredients – saffron strands ( if saffron is added while making the peda , it gives light yellow color to the peda), and chopped pistachio nuts for garnishing.
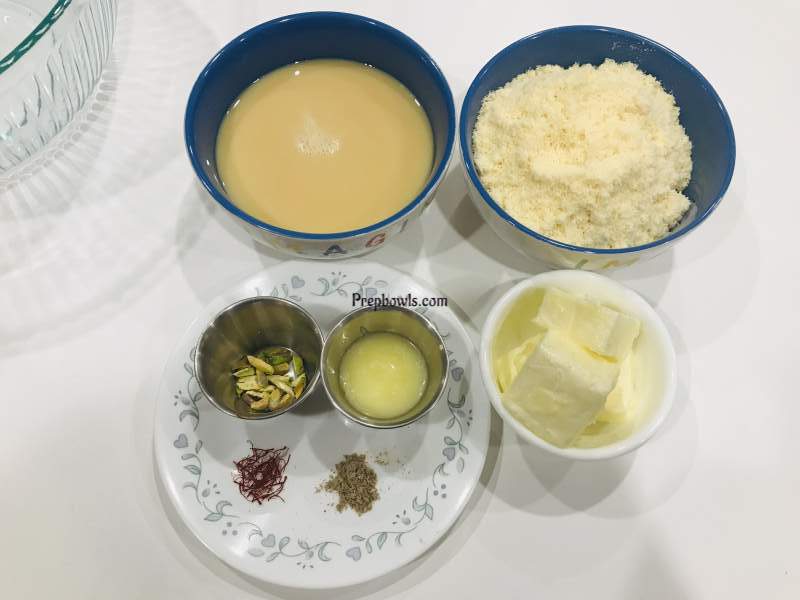
Take a wide, microwave safe bowl , add butter, and microwave on HIGH POWER for 30 SECONDS ( if butter is very soft to room temperature , then you can skip microwaving for 30 seconds). Remove the bowl from microwave, and mix the butter. Now add condensed milk , dry milk mava powder, and two pinches of saffron strands “if using” .
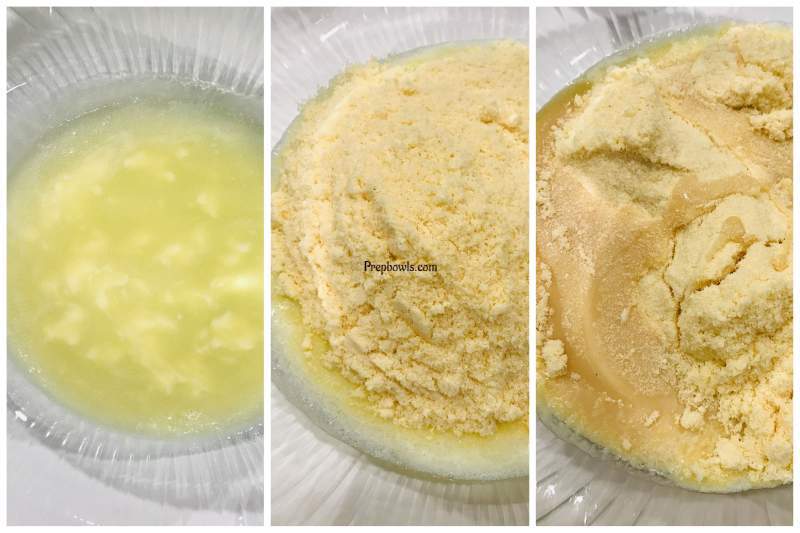
And stir – mix well without lumps using a ladle ( to smooth consistency before putting into the microwave).
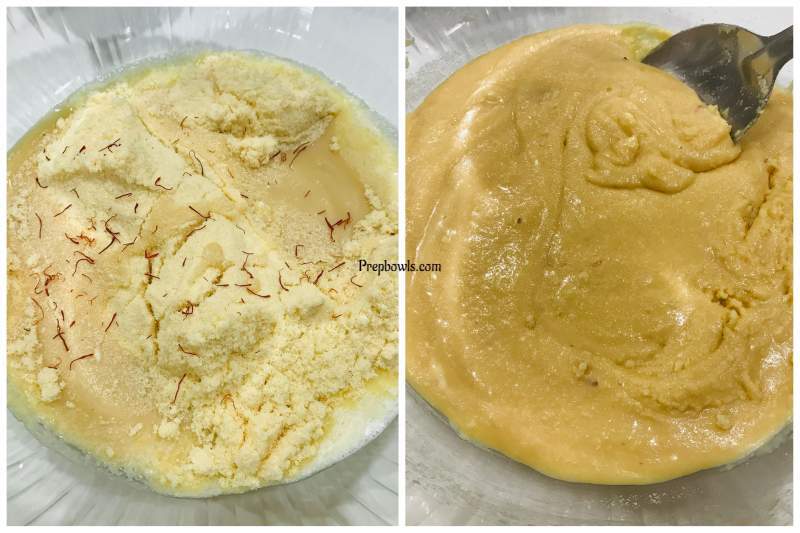
Microwave the mixture for ONE MINUTE on HIGH POWER ALWAYS , Remove the bowl from microwave , stir well again. Put back the bowl into the microwave , and microwave again for ONE MORE MINUTE, Remove the bowl from microwave , stir well again.
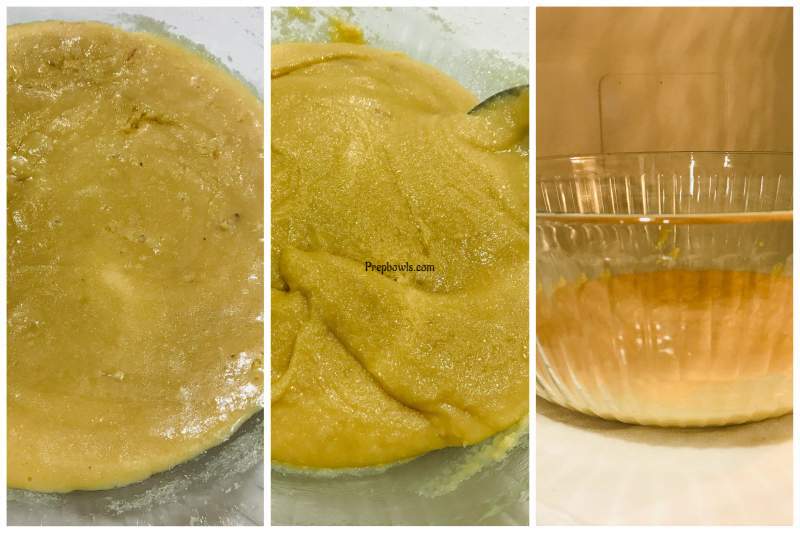
Repeat the step, and microwave for TWO MORE MINUTES , taking the bowl in-between after one minute, add cardamom powder, and mix well . TOTAL microwave cooking time is FOUR MINUTES ( remove after every one minute , stir well , and put it back , there will be slight frothing of the dough on the initial minutes).
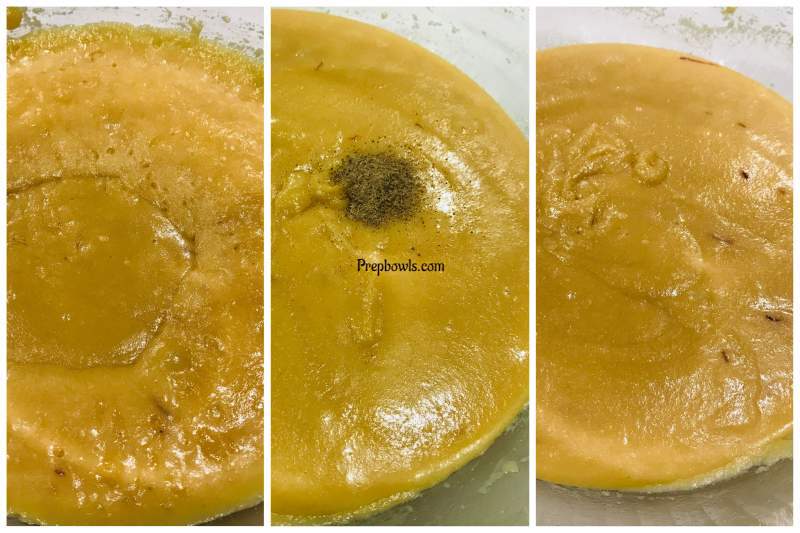
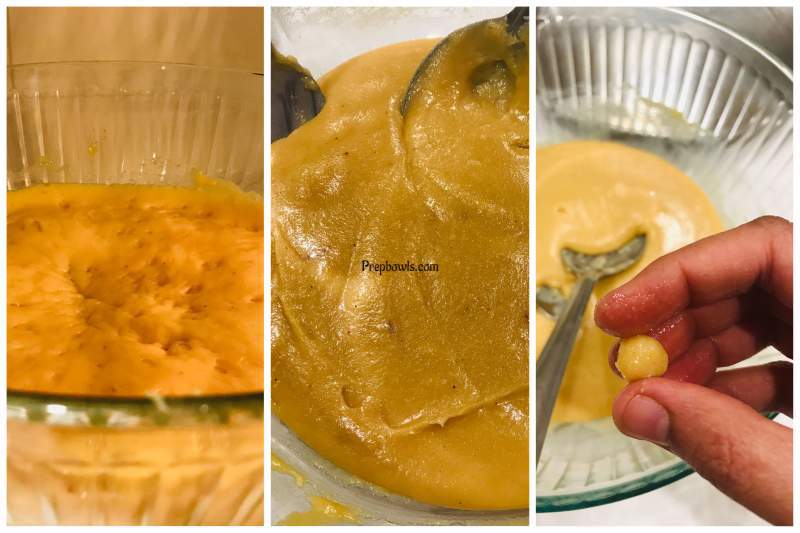
During the last minute, you’ll notice the mixture frothing up high in the bowl , which is normal ,batter is getting cooked. Color of the dough also changes darker. After four minutes of cooking in the microwave, stir the mixture well. Use a teaspoon , and remove a VERY TINY PORTION of mixture from the “SIDES OF THE BOWL“, and with your fingers, greased in ghee , make a round to form shape ( Caution – it will be too hot , so be careful, and use a teaspoon to remove the mixture from the corner of the bowl , and test). Now let the mixture sit / rest at room temperature for ten minutes ( stir in-between).
Take a big plate , and smear one teaspoon of ghee on the full plate. Grease your palm / hands too with a few drops of ghee ( to prevent the dough from sticking). Use a small sized ladle , start scooping the dough from the corner , remove the dough from the ladle, using your greased hand , shape into a ball, slightly flatten the ball using both your palm, place the peda on the greased plate. Repeat the step, and make balls, and then flatten them into peda shape using both the palm.
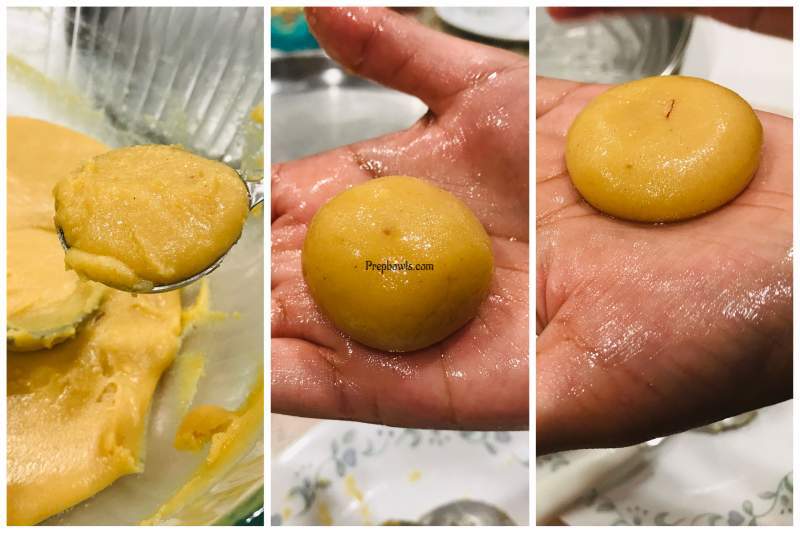
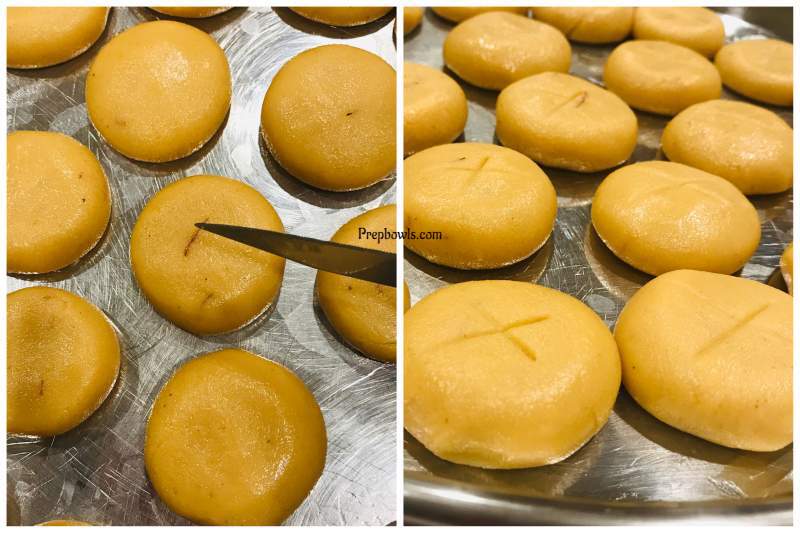
Optional step – Use a soft edged knife , and make a small X mark on the top of the peda ( it gives the signature sweet shop peda look).
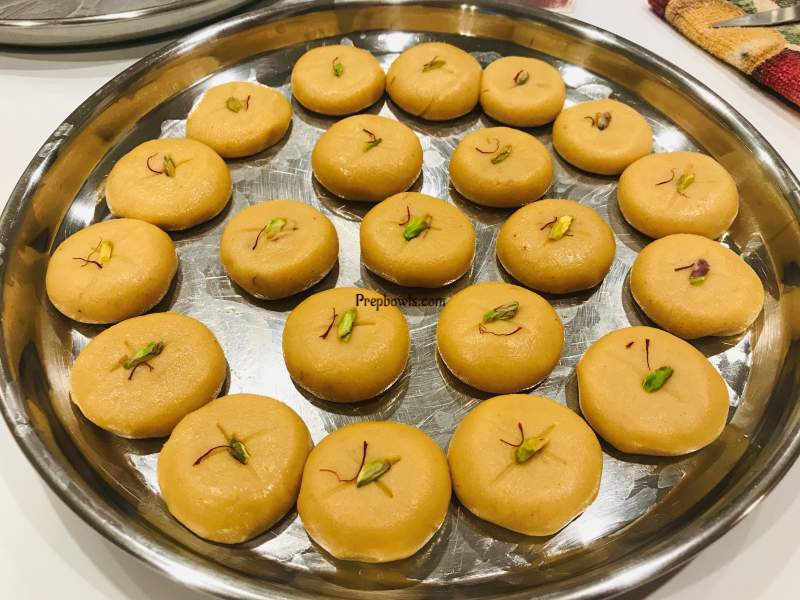
Take one thinly sliced chopped pistachio, one saffron strand, and “gently” press on the top of the peda (so it sticks when the peda are still warm). Can serve the peda after it has completely cooled down ( after an hour, or more hours, or refrigerate overnight for best taste , and texture – so it will completely cool down, and peda consistency will harden/ tighten).
Ingredients
- Optional
Instructions
-
Ingredients Required
- Sweetened condensed milk ( I used one full 14 oz tin ) , Pure milk mava powder , unsalted butter ( I used one full stick Costco - Kirkland brand butter) , cardamom powder ( I used readymade cardamom powder from Indian store , If making at home - grind few whole green cardamom in the mixer to a fine powder ). Optional Ingredients - saffron strands ( if saffron is added while making the peda , it gives light yellow color to the peda), and chopped pistachio nuts for garnishing.
- Take a wide, microwave safe bowl , add butter, and microwave on HIGH POWER for 30 SECONDS ( if butter is very soft to room temperature , then you can skip microwaving for 30 seconds). Remove the bowl from microwave, and mix the butter. Now add condensed milk , dry milk mava powder, and two pinches of saffron strands "if using" , and stir - mix well without lumps using a ladle ( to smooth consistency). Microwave the mixture for ONE MINUTE on HIGH POWER ALWAYS , Remove the bowl from microwave , stir well again. Put back the bowl into the microwave , and microwave again for ONE MORE MINUTE, Remove the bowl from microwave , stir well again. Repeat the step, and microwave for TWO MORE MINUTES , taking the bowl in-between after one minute, add cardamom powder, and mix well. TOTAL microwave time is FOUR MINUTES ( remove after every one minute , stir well , and put it back, there will be slight frothing of the dough during the initial minutes).
- During the last minute, you'll notice the mixture frothing up high in the bowl , which is normal ,batter is getting cooked. After four minutes of cooking in the microwave, stir the mixture well. Use a teaspoon , and remove a VERY TINY PORTION of mixture from the "SIDES OF THE BOWL", and with your fingers, greased in ghee , make a round to form shape ( Caution - it will be too hot , so be careful, and use a teaspoon to remove the mixture from the corner of the bowl , and test). Now let the mixture sit - rest at room temperature for ten minutes ( stir in-between).
- Take a big plate , and smear one teaspoon of ghee on the full plate. Grease your palm / hands too with a few drops of ghee ( to prevent the dough from sticking). Use a small sized ladle , start scooping the dough from the corner , remove the dough from the ladle, using your greased hand , shape into a ball, slightly flatten the ball using both your palm, place the peda on the greased plate. Repeat the step, and make balls, and then flatten them into peda shape using both the palm.
- Optional step - Use a soft edged knife , and make a small X mark on the top of the peda ( it gives the signature sweet shop peda look). Take one thinly sliced chopped pistachio, one saffron strand, and "gently" press on the top of the peda (so it sticks when the peda are still warm). Can serve the peda after it has completely cooled down ( after an hour, or more , or refrigerate it overnight for best taste , and texture - so it will completely cool down, and peda consistency will harden / tighten).
Notes
- This recipe yields 21 milk pedas.
- To make a smooth finish peda - Do not leave the dough for too long , without making the shape. Perfect peda shape without cracks are gotten when the peda are still slightly warm. Also scrape your hand every time, if you have dough crumbles sticking to it , and grease your hands again with a drop of ghee before shaping the next one.
- To microwave - make sure to use a big - wide microwave safe bowl. Else the dough will rise when cooking in the microwave, and overflow, and will create a mess.
- If making homemade cardamom / elachi powder - grind few whole green cardamom in the mixer to fine powder, and use.
- Every microwave model is different , and may require an additional minute or two, or one minute less microwaving time. So please keep an eye from three minutes, and test to see if you can form a ball shape with a small amount of dough.
- The dough will look very soft , and semi solid consistency even after four minutes cooking time, do not panic. First test a small portion of dough from the sides of the bowl , and if you're able to form shape, let the dough rest for ten minutes. Then scoop dough from the sides using a small size ladle or your hands , and shape the pedas. Make sure to grease your hands well before you shape each peda , then flatten the peda by gently pressing both your hands. Note - If you are not able to form a tiny ball shape, then microwave for one more minute.
- For best texture or if you are making it for a party, make the peda ahead of time and refrigerate it overnight. Bring it to room temperature, at least 30 minutes before serving, but not necessary.
- Add any chopped nuts of your choice for garnishing , or serve just plain peda without nuts. Keep in mind, you have to press the nuts in the shaped pedas when it is still warm, else nuts will fall apart.
Find below desserts recipes, for festival, holidays or for any celebrations, Check the links below, I have listed few below. For the complete list of dessert recipes, check the link here – Dessert Recipes from around the globe.
- Cantaloupe Fruit Kesari | Semolina Sweet
- Easy Pumpkin Crinkle Cookies Recipe
- French Macarons With Mango Buttercream
- Oreo Ice Cream Cake
- No Churn – Eggless Pistachio Gelato
- Eggless Black Forest Cake

I Love Hearing From You All!
If you like this recipe, tried it, or have a question? please leave your comments and feedback below, so it may help others to. Share the recipe in social media, this helps more people to find the recipe online!
Connect With Me!!
Don’t want to miss a blog post? Subscribe to blog here Subscribe To Blog to have every post delivered straight to your inbox. It’s totally free.

